Seafile: Personal storage
ERDA Seafile gives you secure file/folder storage, synchronisation, and sharing capabilities, similar to Dropbox, OneDrive, Google Drive, and iCloud.
You get the advantage that your data are stored internally and securely at UCPH’s own infrastructure.
Seafile provides sharing capabilities which can be used to share data with internals and external. In that context it is left to the users to adhere to rules and regulations about confidentiality and sensitive private data.
Getting Started with Seafile
Contain at least eight characters
Include a combination of at least three of these:
Lowercase letters
Uppercase letters
Digits
Special characters
Confirm the password once more and click “Register”.
Once on the Seafile login page, you just need to enter your email address and your newly chosen password for your Seafile account, before pressing “Log In”.
About libraries
Seafile organizes your folders and files in “Libraries”. This is a logical collection of folders and files that makes them easier to manage and optionally share with others. You can create a new library by clicking “New Library” before being prompted to write a descriptive title before you can finally click “Submit”. In this prompt, you can choose to tick “Encrypt” and create a separate encryption password, and the data within will automatically be encrypted before being saved centrally.
In your new library, you can manually upload files and folders that you want to synchronise or share by clicking “Upload” and selecting said files and folders.
You can also install the Seafile client and use it to enter data automatically from your computer, as we will discuss in the next section.
Seafile Client
Install Seafile Client
To synchronise Seafile Library data with your computer, you can download and install the Seafile client. This can be installed on as many computers as you like. You can find a link to Seafile Client either on the bottom of the Seafile page, or by clicking on the link in this section. On the page, click on the client that is relevant for you.
Tips for installation on a UCPH computer
On a standard UCPH computer (B machine), you have access to installing programs by clicking “Request administrator access” in the bottom right-hand corner, unless you are on a special, secure UCPH computer (A machine). If that is the case, you may contact UCPH IT to install the necessary programs.
Set up Seafile Client
During the installation process, you will be requested to “Add an account”, where, among other information, you must fill in the field “Server” and “Username”, which you can find on your Seafile Setup page on the ERDA Homepage.
On the Setup page, you need to click “proceed” with the client set up and it will give you your personal server address and username. Copy what the instructions state in the fields “Server” and “Username”, and insert the information in the respective fields in the below pop-up window with “Add an Account” on the Seafile Client.
Once the client has been installed, you will find a small Seafile icon in your system tray.
Synchronize Files
In order to synchronise files, you can click on the orange icon in your system tray to open and manage your Seafile client.
Right-click your Seafile client in the library you want to synchronise. In the example below, a library has been set up with the title “Project e-infrastructure”, and you must click the “Sync this library” button to make it manually synchronize.
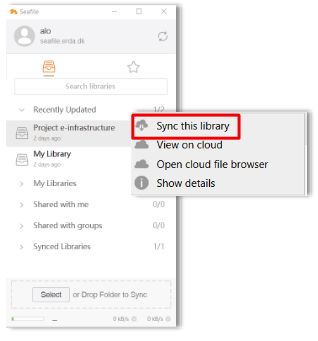
You may be prompted to select which path on your hard drive to synchronise to. Choose this before clicking “OK”.
Note
When the synchronisation of a library is initiated, the cloud icon will change to show the progress, and the cloud will turn green once the process is complete. This is also visible from within the Seafile client.
Exchange or share data with others
You can easily and quickly exchange data - a whole library, a folder or a specific file - using Share Link. The Share Link method is good for one-off exchanges of data with others or with collaboration partners who are not ERDA or ERDA Seafile users. With Share Link, you can, in fact, share data with arbitrary recipients. i.e. the recipients does not need to have an ERDA Seafile account.
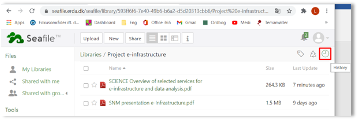
This procedure is the same, whether you want to share a library, folder, or file. In the example below, a file is shared via Share Link.
Click on the library in which the file is stored
and hold down the cursor above the specific file you want to share. Click the “Share” icon
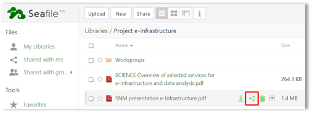
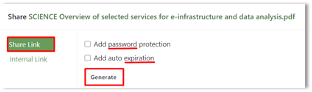
You can further secure the Share Link exchange with a password and an expiry date. Tick the respective field if you want to add either of the two additional security features, before clicking “Generate”
You can then click “Send”, where you will be prompted to write the email addresses of the recipient(s). You can optionally write a short message in the “Message” field, before finally clicking “Send” once again
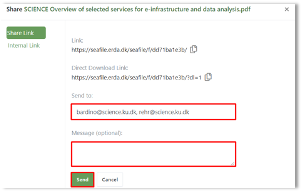
An email will be sent to the selected recipients containing a link to the selected file.
Share data with collaboration partners
You can share a whole Seafile library, a folder or simply a file with internal or external collaboration partners. This is done via “Share to user/group”, and this method is well suited for more permanent sharing needs. The method presume that the recipient has an ERDA Seafile account.
The procedure for sharing a library or folder is the same. In the example below, a whole library is shared.
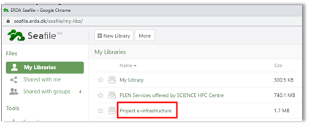
Hold the cursor above the library you want to share, and click the “Share” icon
You can select two different options for sharing your library depending on whether you want to share to user or group.
Share to user
Click “Share to user”.
Write the recipient’s Seafile email in full in the “User” field, and your desired recipient will appear. Click the name or email appearing. Click the arrow under “Permission” and select whether the recipient is to hare “Read-Write” or “Read-Only” access. Click “Submit”.
If you subsequently regret the rights granted to the recipient, you can change this by clicking the pencil icon. If the recipient is to no longer have access, you can delete the access by clicking on the “X” button.
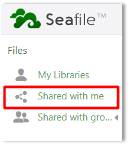
Under “Shared with me”, your collaboration partners can see what you have shared with them.
Share to group
If you have created a Group in Seafile with some internal and/or external collaboration partners, you can easily share your library with them (See the Create group section below).
Click “share to group”.
Click the arrow under “Group” and find the Group with which you want to share. Click the specific “Group”, and select which permission level this group should have, before pressing “Submit”.
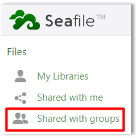
Under “Shared with groups”, your collaboration partners can see what you have shared with them.
Create group
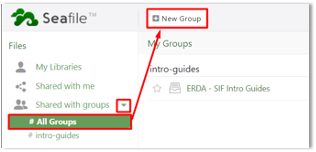
You can create a group by clicking the arrow under “Shared with groups” and then “All Groups”.
Once on the new page, click on the “New Group” at the top.
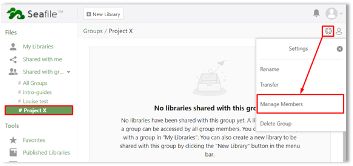
Give the group a name, before clicking “Submit”. You can add members to the group b y clicking on the settings icon and then “Manage Members”
Write the recipient’s Seafile email in full in the “Add group member” field, and click on the name or email once they appear. Click “Submit”.
Receive data from others with “Upload link”
With “Upload Link”, you can invite arbitrary acquaintances or collaboration partners to upload files or folders directly to a selected location in your Seafile Library. The method does not require the recipient to have an ERDA Seafile account.
The given example is in order to allow the upload to a folder.
IF you hold the cursor above the specific folder in which you want to receive data from others, you can click on the “Share” icon, and click “Upload Link”.
You can further secure the sharing with a password and an expiry date. Tick the respective fields if you want add either of the two additional security features, before clicking “Generate”.
You will see a Upload Link, and if you click “Send”, you will be prompted to write the email address of the recipient and optionally include a short message in the “Message” field. Click “Send” once finished. The recipient will now be able to upload files or folders to your Seafile library.
Tips
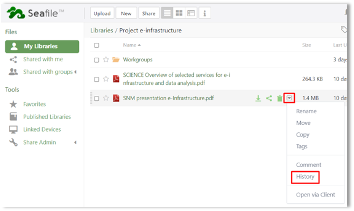
View file history
A file history can be extra useful when working together with others on data. Hold the cursor above a specific file, and click the arrow-down icon. Click “History” and see previous versions of the file.
Find deleted file/folder
Click on the recycle icon “Trash” to retrieve deleted files or libraries.
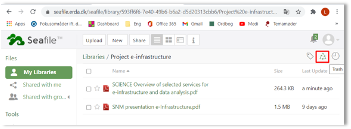
View library history
Open your library and click on the clock icon “History”